macOS
macOS is a Unix-like operating system developed by Apple Inc. It is the operating system that powers the Macintosh family of computers.
Setting up a new Macbook will be tough and cumbersome. Every time I am getting a new Macbook, I go over the same steps on how to set it up for my working experience.
I create a record of my setup, hoping it’s helpful for others too!
Install
Install Older versions
Get started
Setting Up Your Mouse
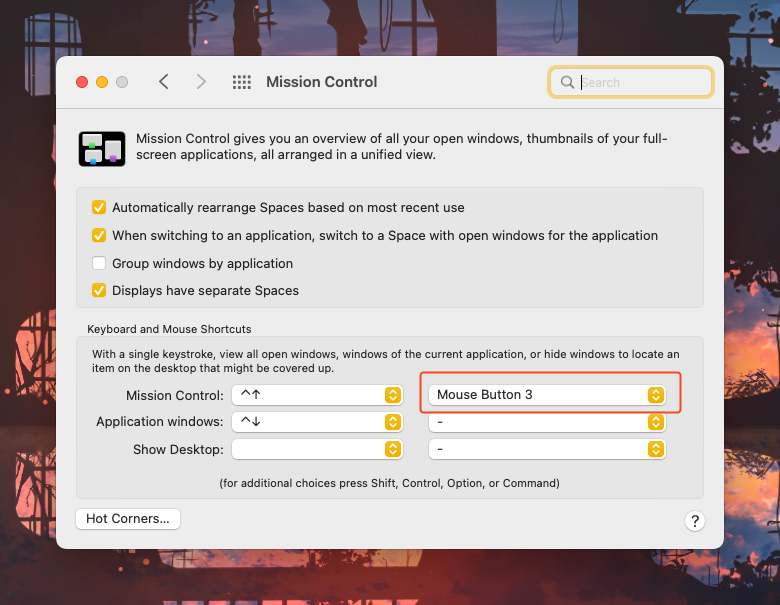
Activate Misson Control with a mouse button
Enable Tap to Click
When setting up a new Macbook, one of the first changes we make is enabling the tap-to-click feature for the trackpad.
Go「System Preference -> Trackpad -> Point & Click」and enable 「Tap to click」 option.
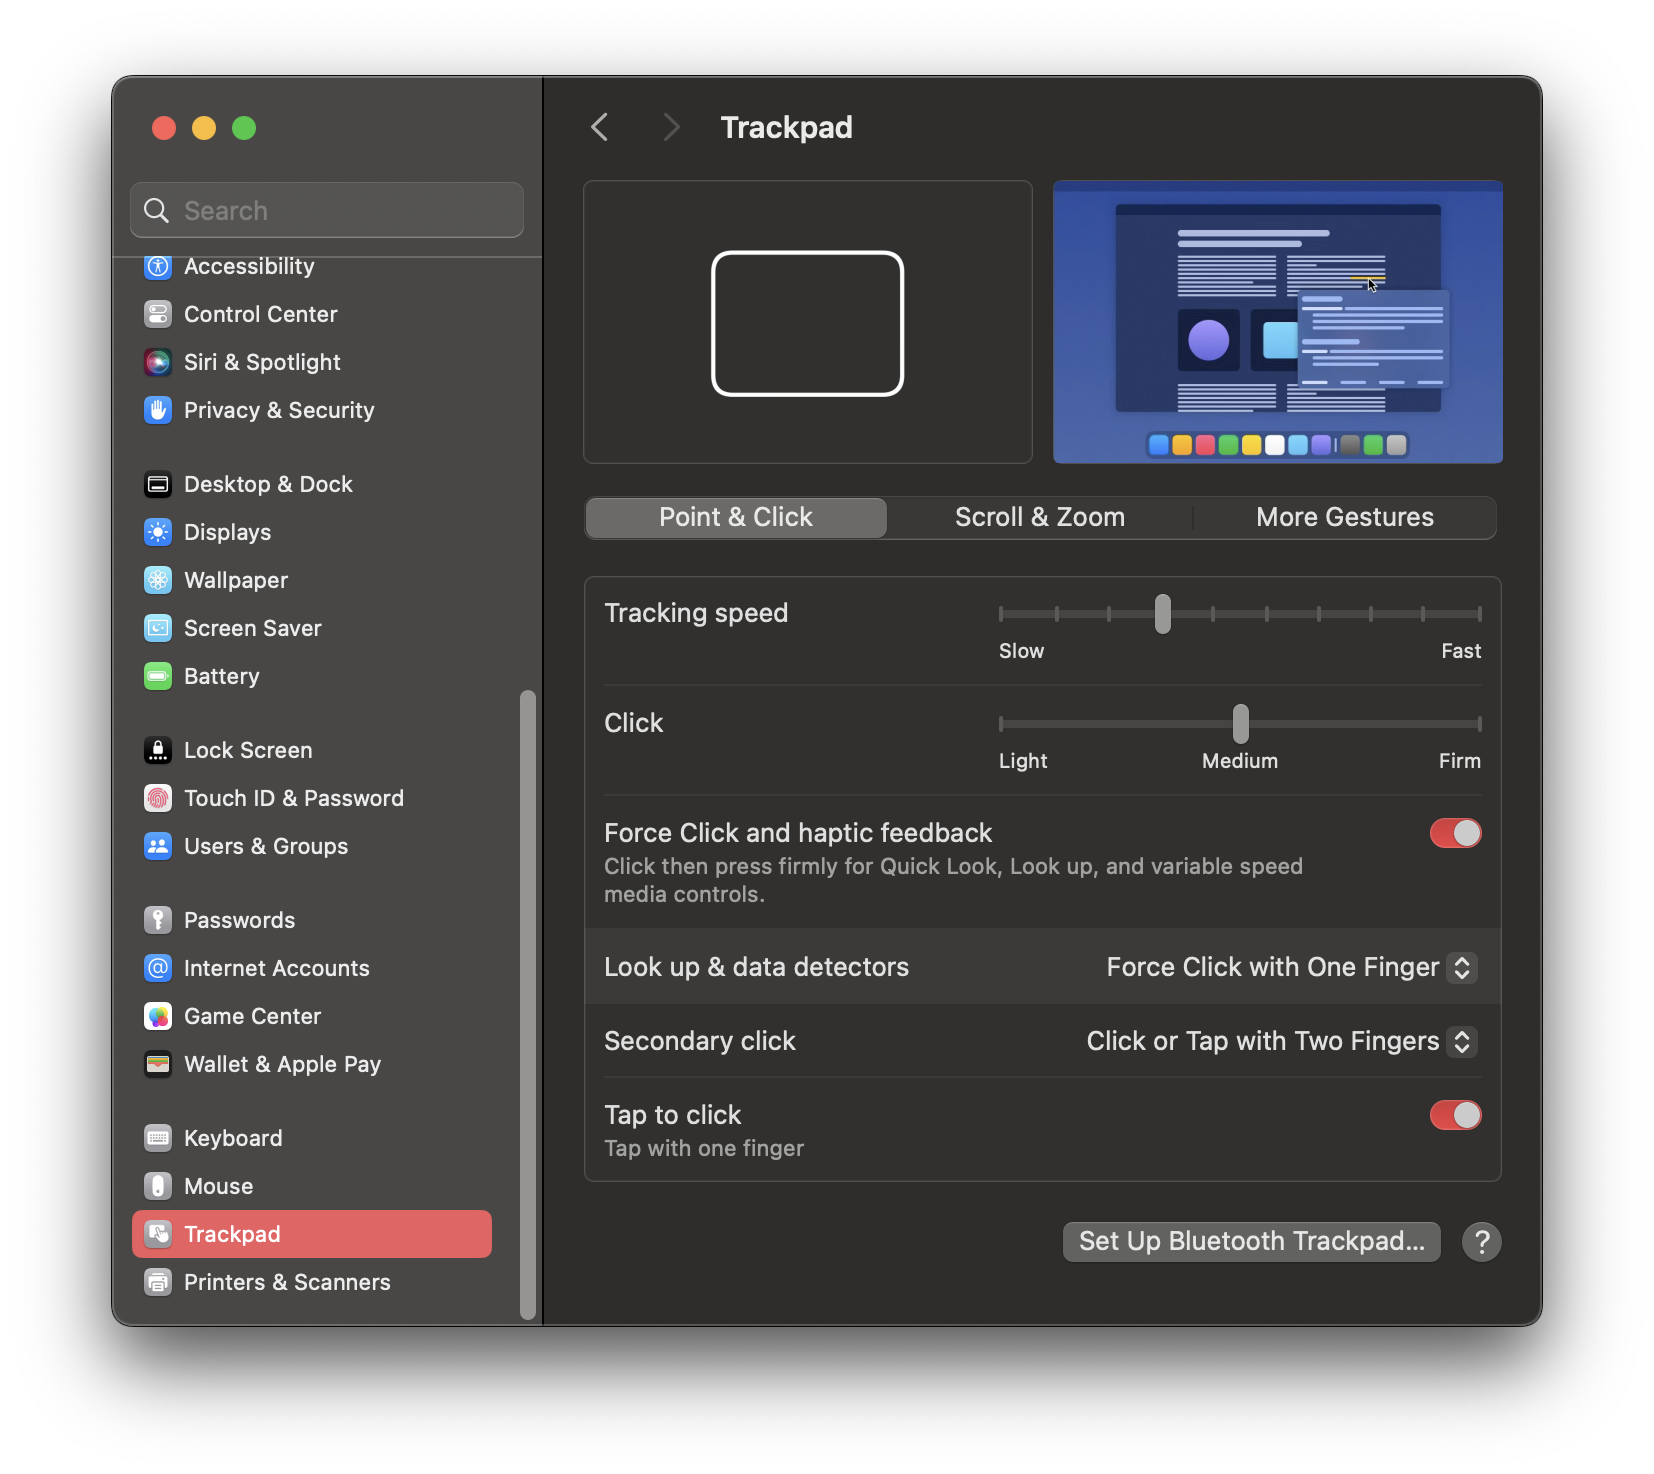
$ defaults write com.apple.driver.AppleBluetoothMultitouch.trackpad Clicking -int 1
Enable Three Finger Dragging
In general, “tap to click” on your Macbook to avoid a force-click on the trackpad. But this doesn’t work when it comes to dragging and repositioning windows.
Also, I’m big fan of tree finger dragging.
- Go 「System Preference -> Accessibility」.
- In the Accessibility sidebar, choose option 「Pointer Control」.
- Click the button 「Trackpad Options」.
- Enable dragging and select 「three finger drag」.
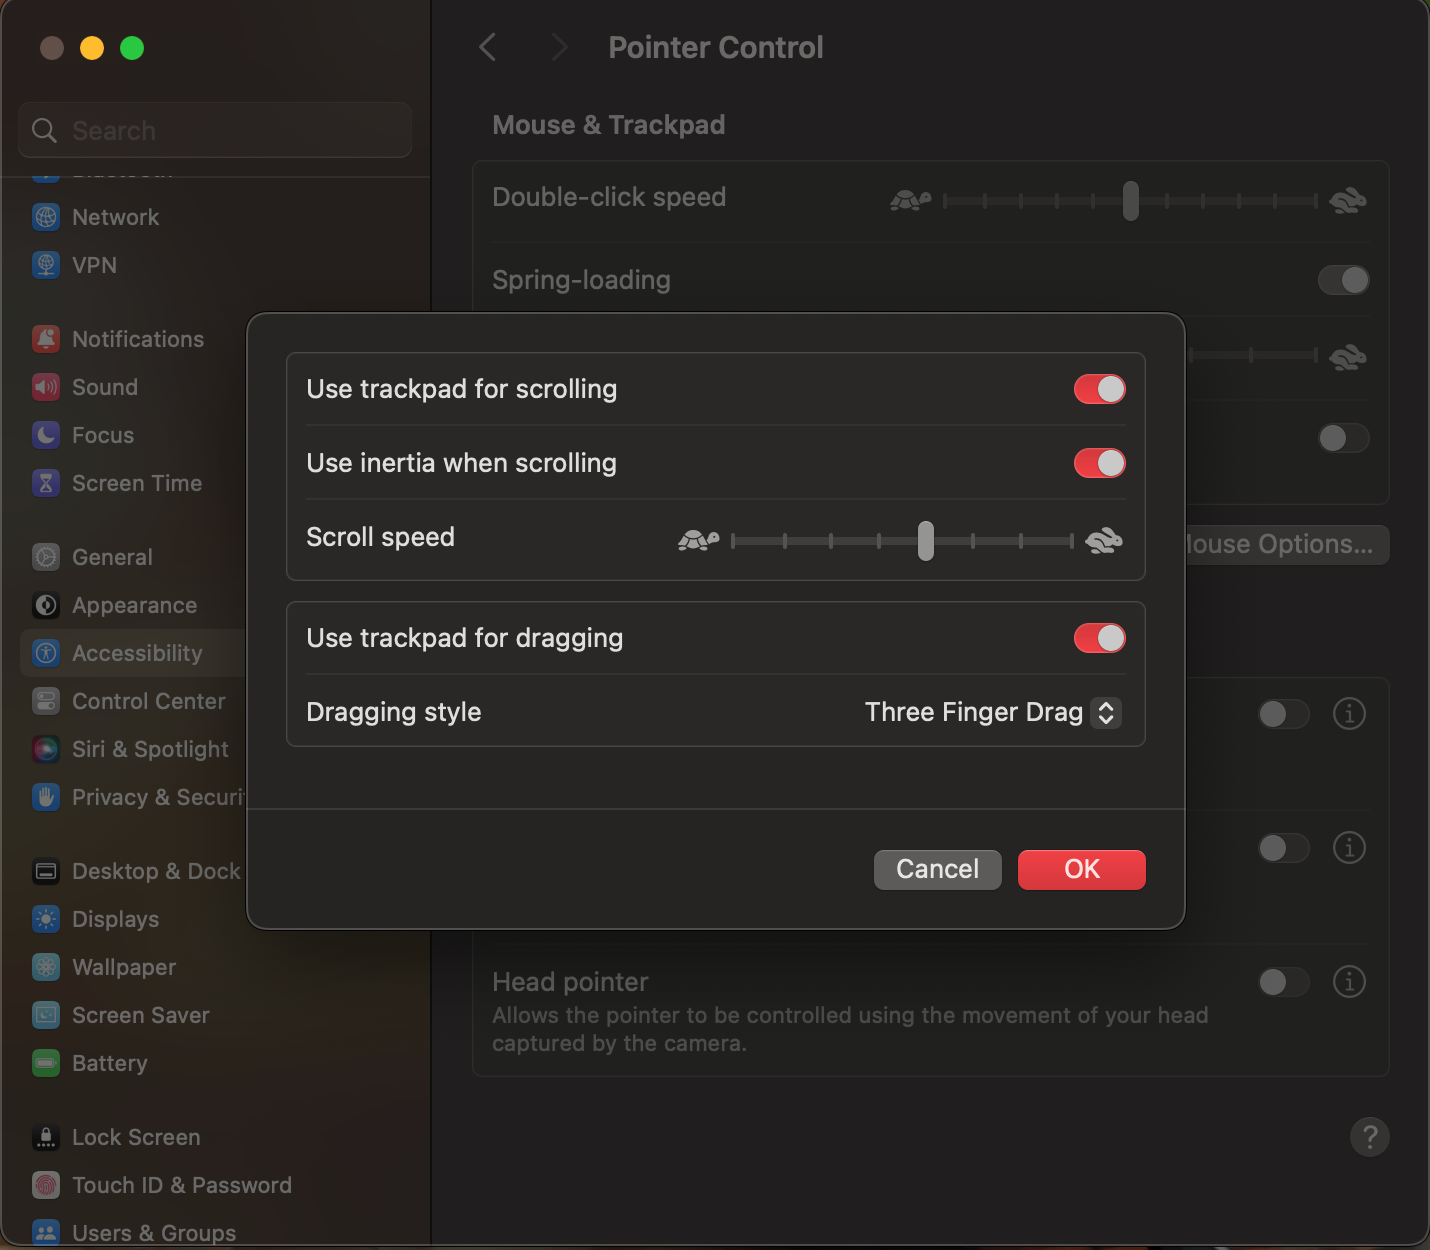
$ defaults write com.apple.AppleMultitouchTrackpad TrackpadThreeFingerDrag -int 1
Enable App Exposé with trackpad
“App Exposé” lets you see shows you all open and unhidden windows for your current app.
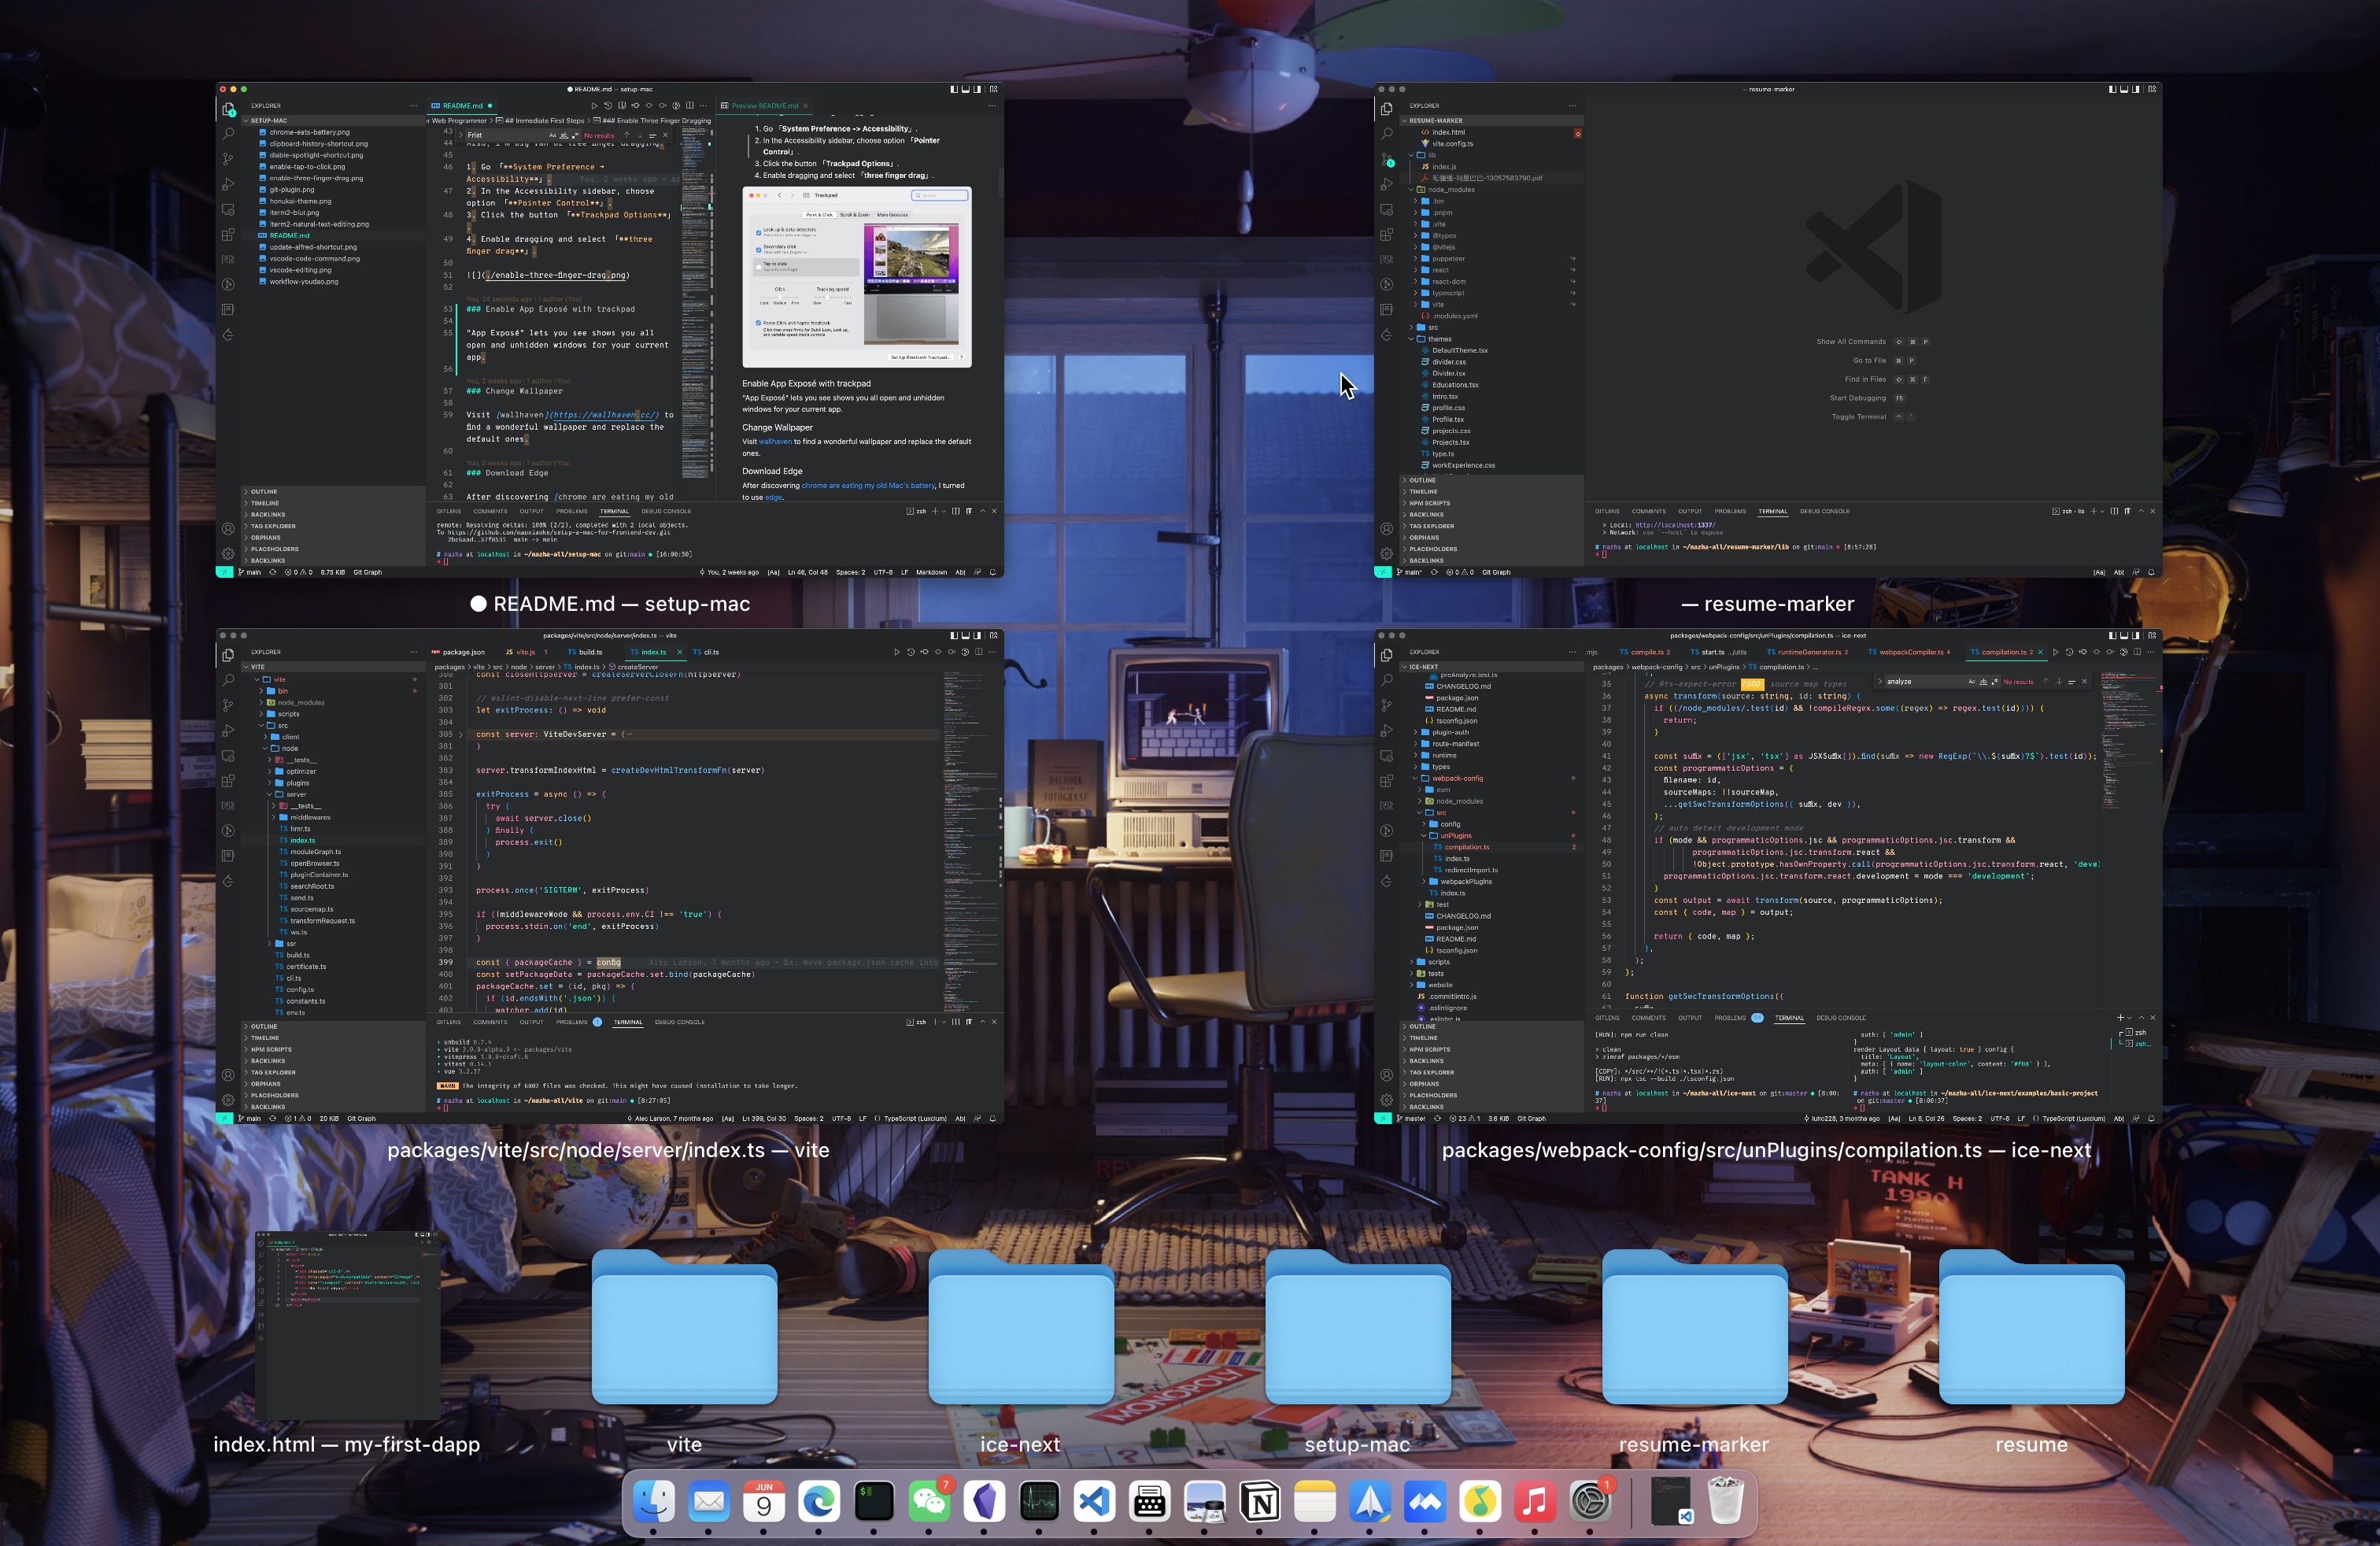
- Go 「System Preference -> Trackpad」.
- Click the 「More Gestures」.
- Enable “App Exposé” and select 「Swipe down with four fingers」.

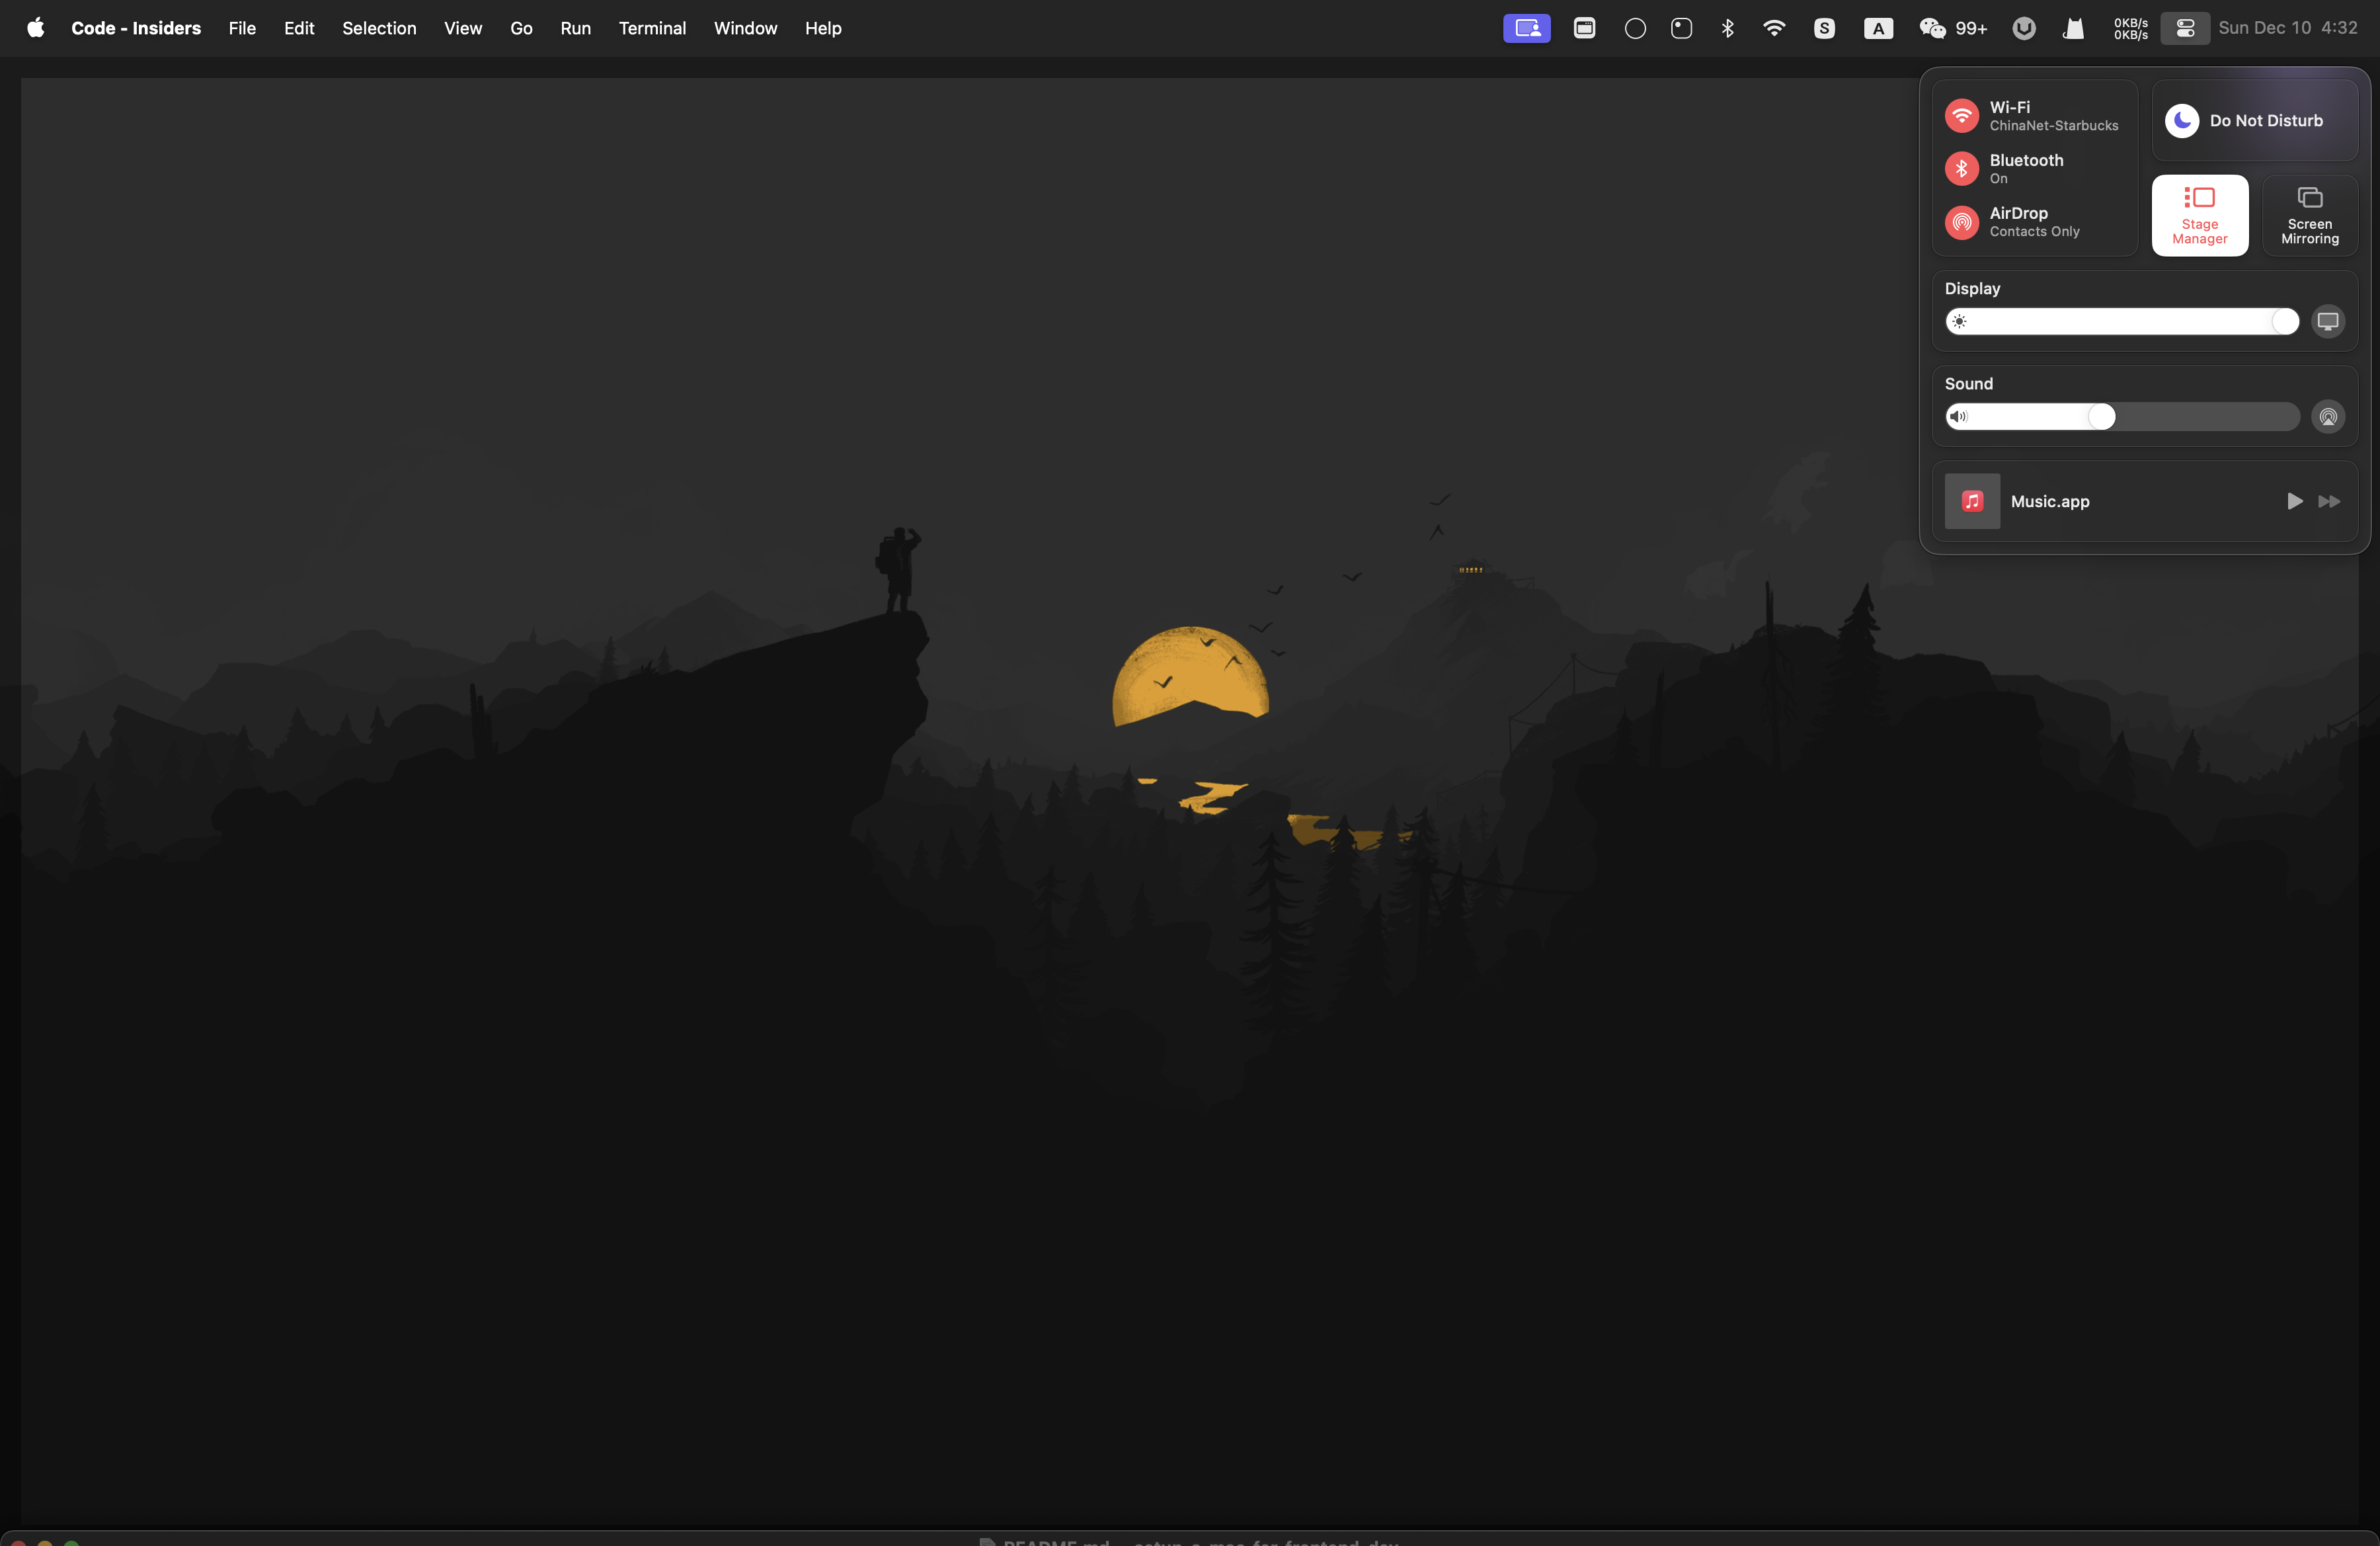
Enable Stage Manager
Compared to multiple windows, I prefer Stage Manager. This feature arrived with macOS Ventura, and provides a little bit of ability to make your windows less cluttered.
- Click Control Center in the menu bar, then click Stage Manager.
Software
- Xcode
- Alfred
- Homebrew
- https://github.com/milanvarady/Applite
- https://github.com/alienator88/Pearcleaner